☆ The tour is always updated to reflect the changes in the last stable or beta version.
SideSlide is a customizable workspace that can be docked to any corner of your screen or hidden when not in use. You can quickly show or hide it with your mouse or a hotkey.
Move It Around: Drag the title bar to relocate the workspace. It will automatically tuck away when it gets close to the edge of the screen.
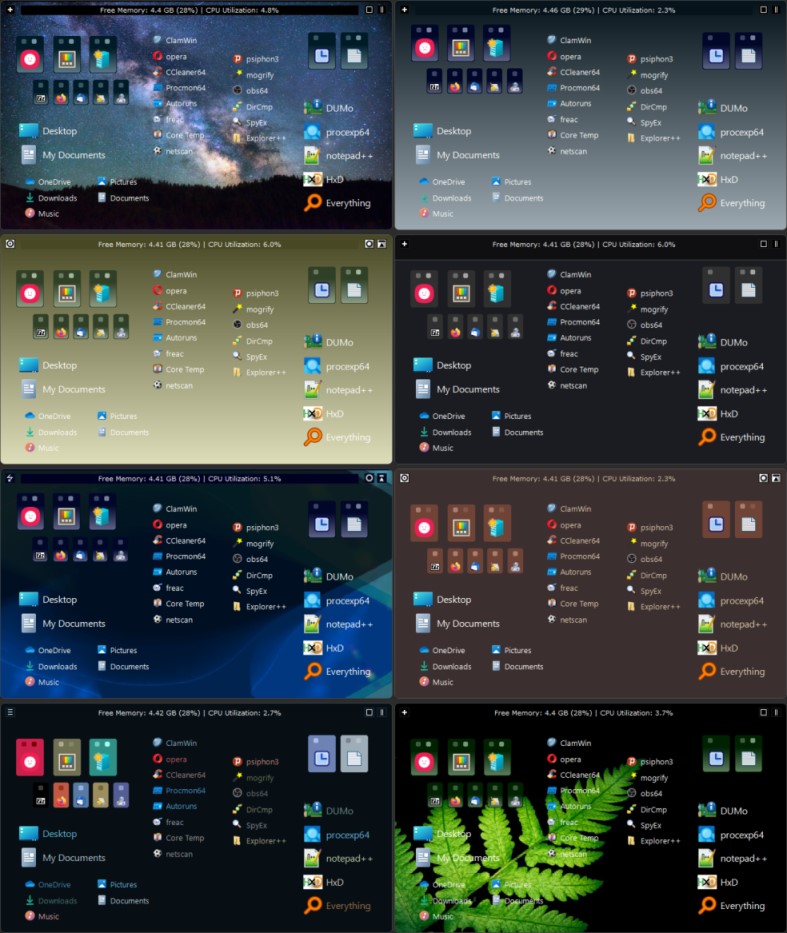
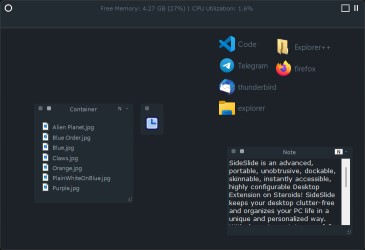
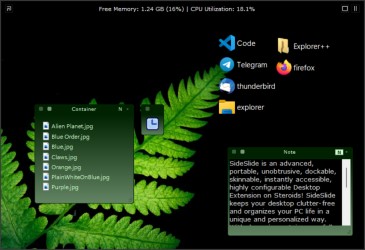
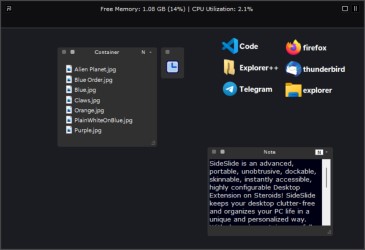
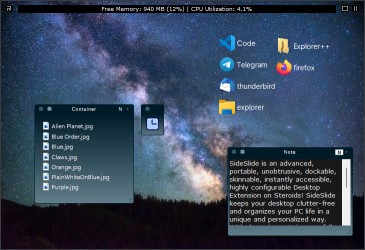
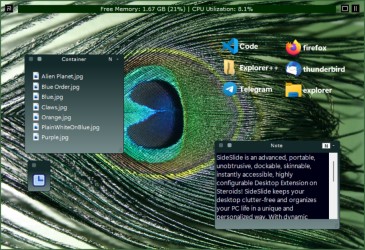
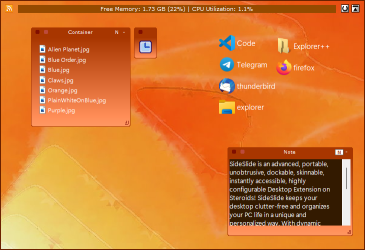
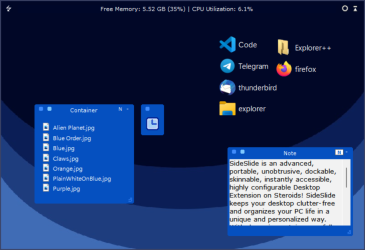
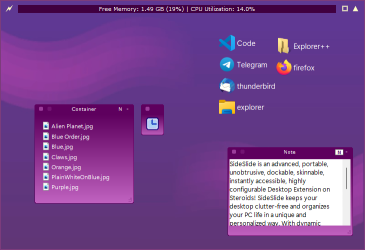
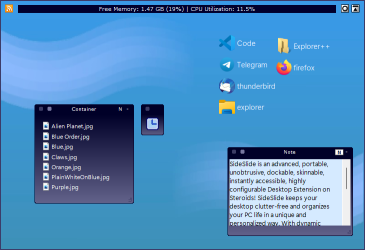
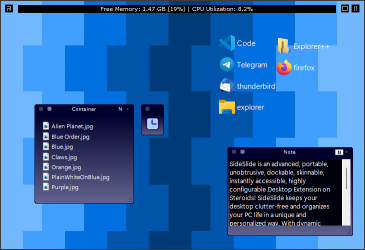
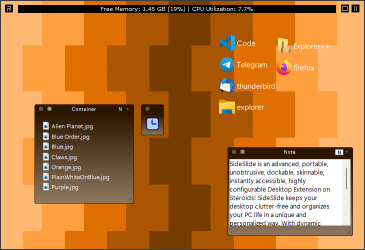
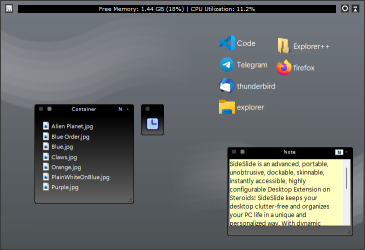
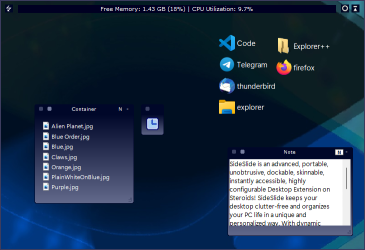
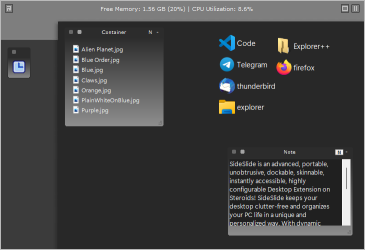
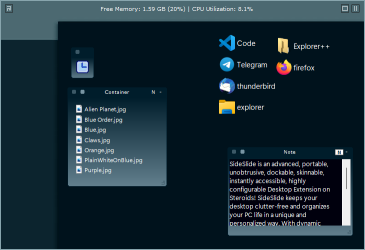
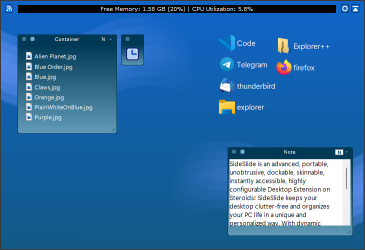
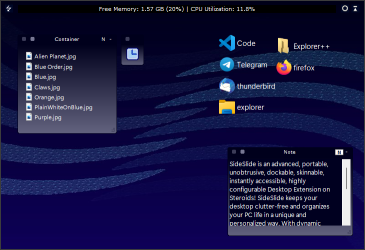
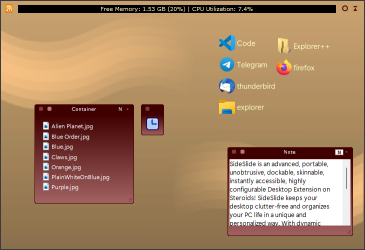
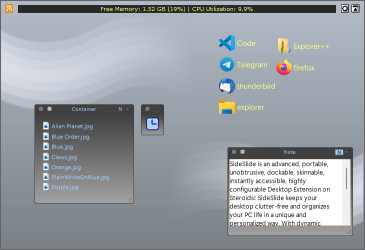
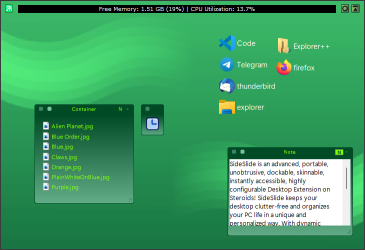
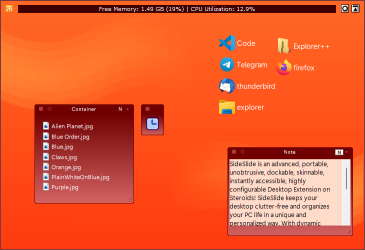
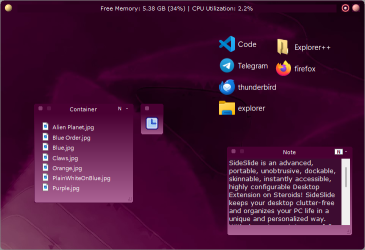
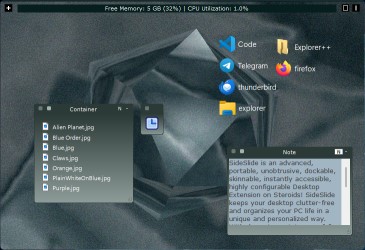
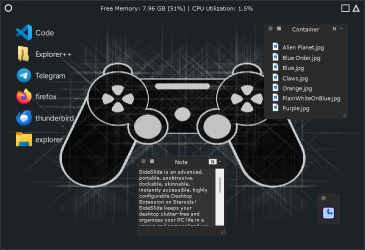
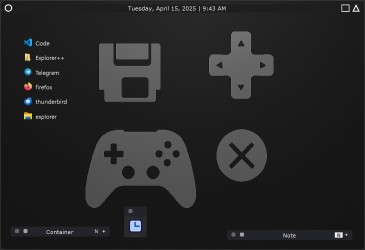
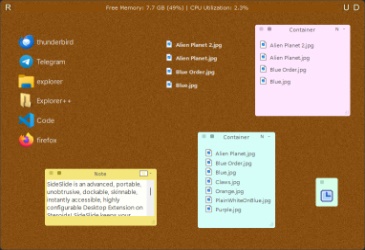
Here's an example of the workspace shown in different styles:
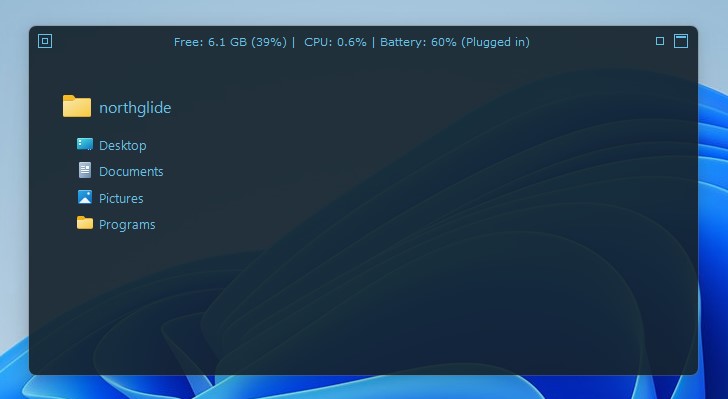
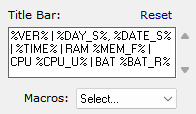
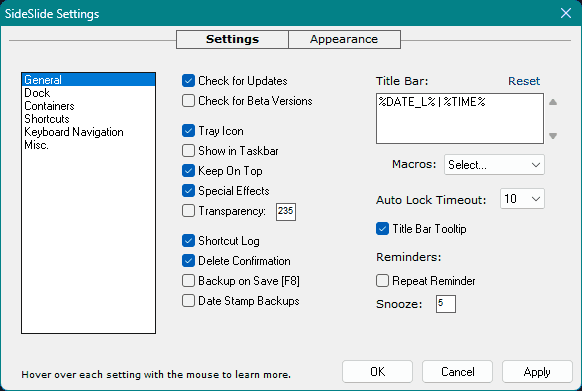
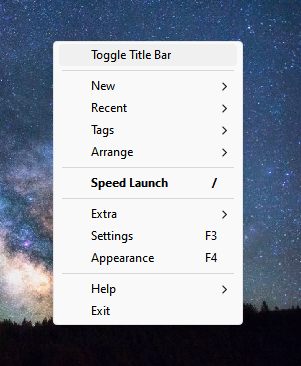
The title bar can be configured to display various types of information. Any text typed into the Title Bar field will be shown, in addition to the following macros:
| %CPU_U% | CPU Utilization |
| %MEM_F% | Free Memory |
| %BAT_R% | Battery Remaining (percent) |
| %BAT_S% | Battery Status (Plugged in/Discharging) |
| %DISK_T%x | Total disk space available on drive X (replace X with the drive letter) |
| %DISK_U%x | Disk space currently used on drive X |
| %DISK_F%x | Free disk space remaining on drive X |
| %DATE_L% | Long Date |
| %DATE_S% | Short Date |
| %DAY_L% | Long day-of-week |
| %DAY_S% | Short day-of-week |
| %TIME% | Time (12 or 24-hour format) |
| %CLOCK%±## | Show a clock for a different time zone. Example: %CLOCK%+07 / %CLOCK%-05 |
| %VER% | Program's version |
Example:

To configure the Title Bar, open the Settings dialog [F3] and select General → Title Bar:
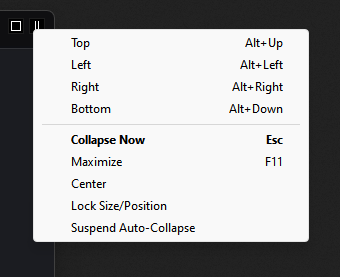
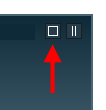
To position the workspace at the corner, drag it or right-click on the "Collapse Now" button located in the top-right:
The screenshot below depicts the workspace in its typical "working mode," revealing only a slim segment of SideSlide's docking bar:

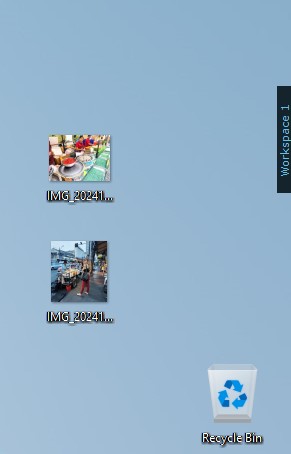
A workspace tab is showing with the caption Workspace 1.
[Win]+[Alt]+[S] by default) to invoke the workspace using the keyboard.Use the Settings & Appearance dialog change most of the default behavior and completely change the way SideSlide looks.
Add different kinds of objects to the workspace by right-clicking an empty place inside the workspace to show the popup menu. Select New and the object you'd like to add from the menu:

There are other ways of adding objects to the workspace, such as, using the Online Library, dragging and dropping from Windows Explorer (e.g. your desktop) or the web browser, copying and pasting and more. More info can be found below.
Once adding objects to the workspace is complete, there is an option to lock the workspace for editing to prevent accidental object movement:

The workspace is expandable beyond its limits by the use of containers. New containers' size is initialized to a default value that can be manually adjusted by holding down the left mouse button and dragging it from the bottom-right corner, or by right or middle-clicking the bottom right corner to auto-size it:
The container will be resized if there is space for it to expand to, and then revert back to the original size.
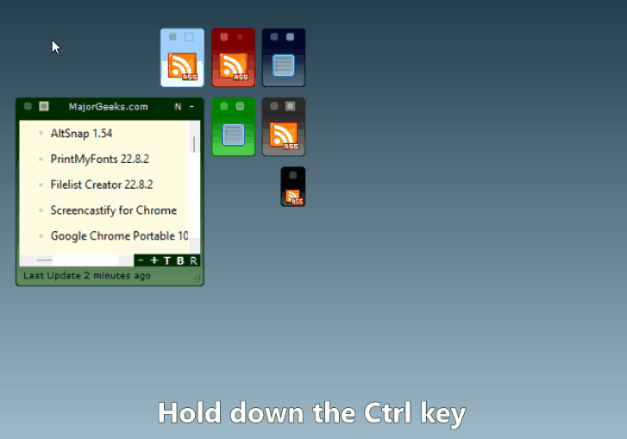
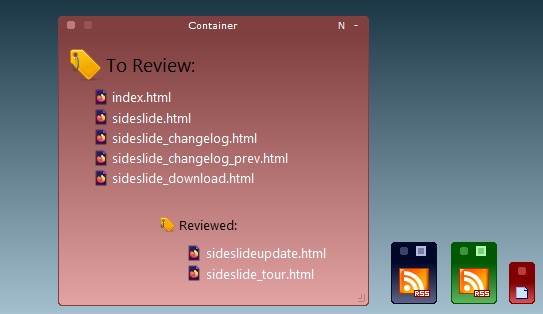
Containers offer a solution for organizing an array of elements. These include file and directory shortcuts, RSS news feeds, notes, URLs, images, and even the option to integrate folder connectors linking to physical folders on the disk (please note that this experimental feature is not covered in this tour). Containers have the ability to be detached from the workspace, shrunk and folded to occupy minimal space, repositioned, resized (with Ctrl+Z for undoing a move/resize operations and Ctrl+Y for redoing), renamed, rearranged, and even customized with varying colors, among other options. Add multiple shortcuts to the same container and group a bunch of them together using tags, or simply start multiple shortcuts at once.
- Using a container to manage a project
Tip: Rename a single container to #STARTUP (a hashtag followed by the word STARTUP in all caps) to automatically launch all the shortcuts inside it when SideSlide starts. This feature is ideal for quickly adding or removing startup programs when SideSlide is configured to launch with Windows.
The following clip illustrates the basic operations that can be performed with containers within the workspace:
- Container basics


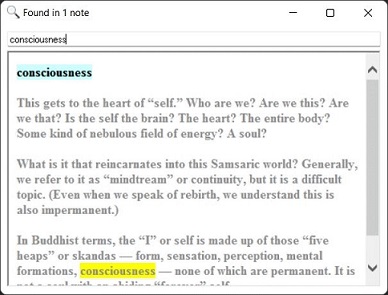
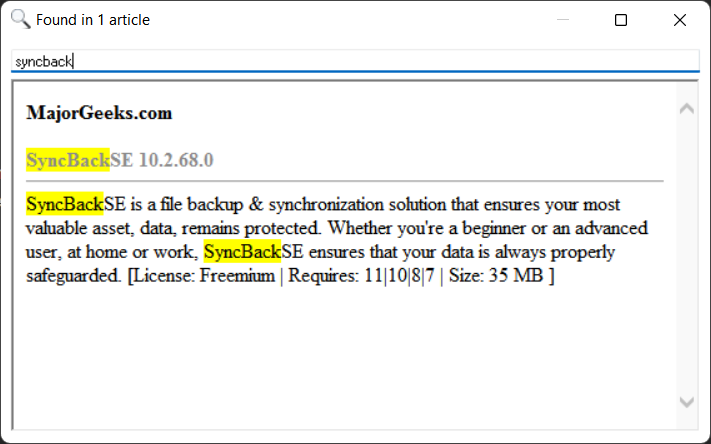
- Both note title and content are searched
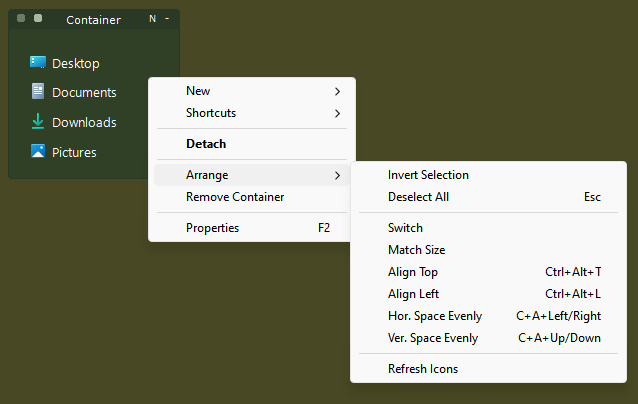
Adjust container spacing by selecting multiple times to either increase or decrease it. Alternatively, use [Ctrl+Alt]+Up/Down to modify vertical spacing or [Ctrl+Alt]+Left/Right to adjust horizontal spacing between containers. For alignment, press [Ctrl+Alt+T] to align containers to the top or [Ctrl+Alt+L] to align them to the left. Refer to the "Keyboard Navigation" section below for additional details.
The animation below demonstrates how to use the Select Tag button to group multiple shortcuts within the same container:
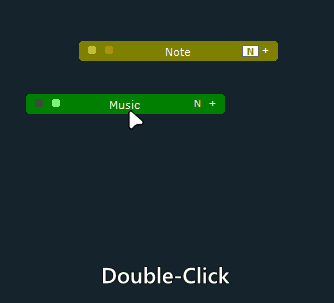
Some tips for creating notes:
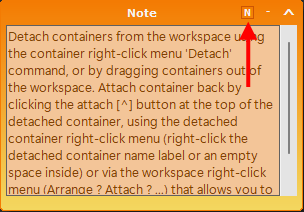
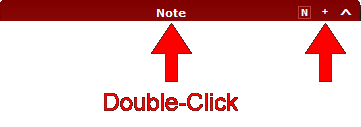
Detach containers from the workspace using the container right-click menu's 'Detach' command or by dragging containers out of the workspace. To attach a container back, click the attach [^] button at the top of the detached container, use the detached container's right-click menu (right-click the detached container's name label or an empty space inside), or use the workspace right-click menu (Arrange → Attach → ...) to attach all or individual containers back.
Containers will attach and detach to the last used location, unless you drag a container out of the workspace (in this case, it will detach next to the workspace on the side it was dragged from), or if you attach a container back to the workspace while the workspace is visible and the container hovers directly above it (in this case, it will attach to the exact place in the workspace it's above).
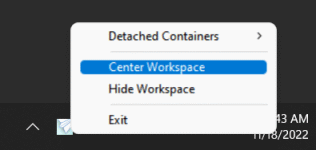
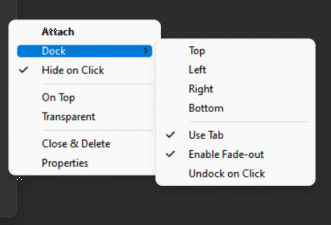
Once the container is detached, dock it to any side of the screen (top, bottom, left, or right), completely hide it (a thin border line is always visible), or show its name in a tab for easy access. There are more settings that can be controlled for each detached container individually by accessing the detached container's right-click menu.
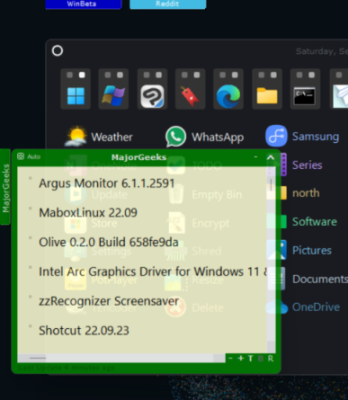
Here's a screenshot of a few detached RSS news feed containers:

The most common objects added to the workspace are shortcuts. Shortcuts can have custom sizes, emphasis, and colors, making it easy to find what you're looking for. They can be grouped and identified by tags, allowing you to focus on your current task and even launch multiple related shortcuts by starting just one. Shortcuts can point to files, folders, web URLs, or system commands.
Adding Shortcuts
Manually add shortcuts using the New right-click menu (Right-Click the workspace → New...) or by dragging and dropping files from Windows Explorer or your web browser to the workspace or different containers (drag the file to the screen corner where the workspace is located, and it will pop out). You can also copy files from Windows Explorer and paste them into the workspace or a container using [Ctrl+V]. To paste shortcuts into a new container, use [Ctrl+Shift+V] or the 'Paste to Container' option in the menu. SideSlide shares the global clipboard with Windows, allowing you to copy files from within SideSlide and paste them to another location, like the Desktop folder.
Tip: Add a new website shortcut by dragging the URL from your web browser's address bar.
Arranging shortcuts with the mouse
- Basic Drag and Drop
Select multiple shortcuts with the mouse, just like selecting icons on the desktop. Then, click and drag a single shortcut by its name label (not the shortcut's icon) to sort all the others accordingly.
Shortcut Mini-Toolbar
Select newly added shortcuts with the mouse to show the shortcut mini-toolbar. Use the toolbar buttons to quickly apply style settings or manipulate selected shortcuts: Start all selected shortcuts, zoom-in, zoom-out, increase and decrease spacing, manually set the size, toggle bold font, sort ascending (A to Z), sort descending (Z to A), select color and remove selected shortcuts:

More on shortcuts:


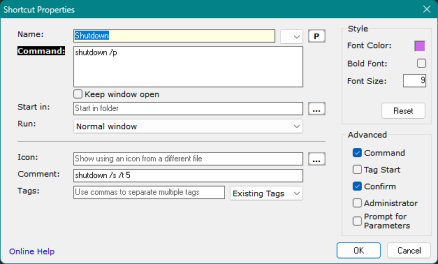
Tip: Use && to separate multiple commands.
Example 1: Disable hibernation, put the computer to sleep, and re-enable hibernation:
powercfg -hibernate off && rundll32.exe powrprof.dll,SetSuspendState 0,1,0 && powercfg -hibernate on
Example 2: Run /SleepStudy and move the result from System32 (Sysnative) to the desktop:
C:\Windows\Sysnative\powercfg.exe /sleepstudy && move C:\Windows\Sysnative\SleepStudy*.html c:\users\john\desktop\
Example 3: Kill WhatsApp and Telegram, then restart Explorer to refresh the notification area icons:
taskkill /f /im WhatsApp.exe && taskkill /f /im Telegram.exe && taskkill /f /im explorer.exe & %systemroot%\sysnative\cmd.exe /c start /B explorer.exeWhen using a custom icon for System Command shortcuts, a command icon indicator will be overlaid on top of the custom icon:
This can be disabled from [Settings → Shortcuts → Command Icon Overlay].
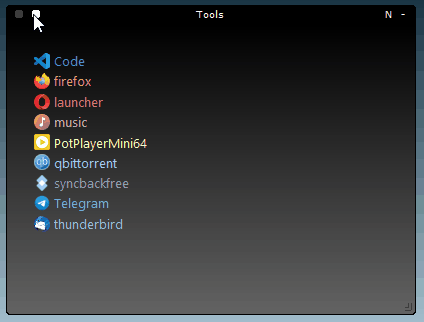
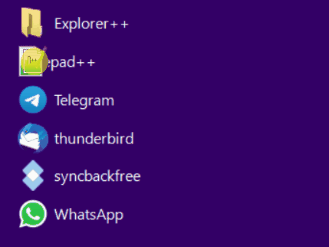
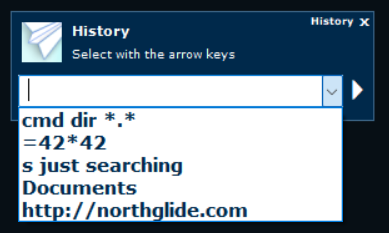
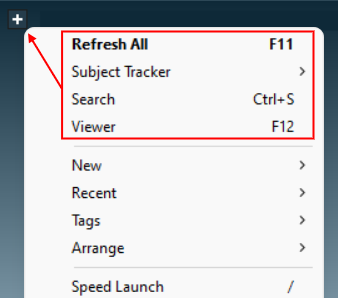
Press [/] (forward slash) to display the Speed Launch list and refresh your memory:
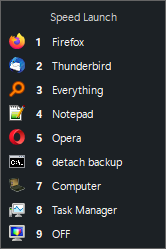
- Example Speed Launch list
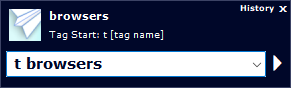
When you launch the selected shortcut (using either the keyboard or mouse), all other shortcuts sharing the same tag will start automatically. This feature is useful for opening multiple folders simultaneously, launching all your web browsers when testing a site, and more. You can also use the shortcut's right-click menu to execute a tag start.
(More on shortcuts)
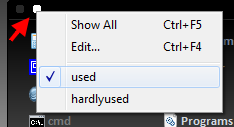
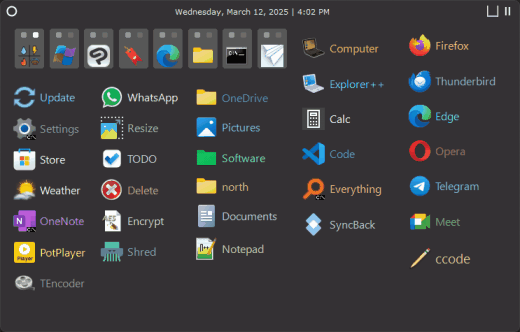
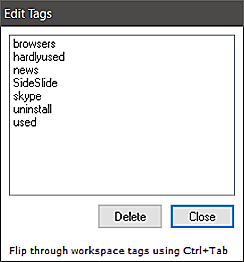
Scroll through workspace tags using [Ctrl+Tab] or show shortcuts that share the same tag within a single container (see above for the container Select Tag button). Example of flipping through workspace-wide tags:

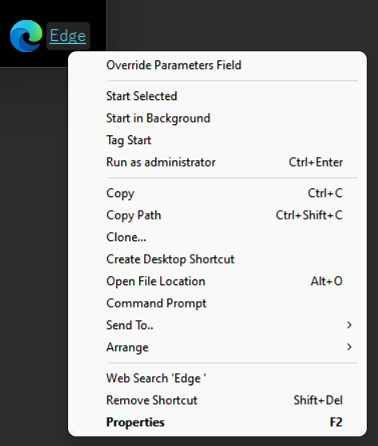
A shortcut right-click menu example for a shortcut with parameters
Spacing:
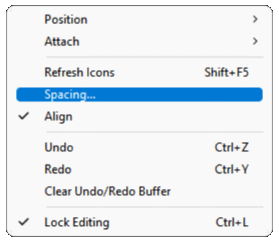
Spacing... under the Arrange menu
Select this option to manually set the spacing (in pixels) between shortcuts in the workspace when arranging them in columns. You can customize this setting for each container individually through the Container Properties dialog [F2]. Adjust the spacing manually using the keyboard (Ctrl+Alt+Up/Down arrow) or by clicking the corresponding button in the Shortcut Mini-Toolbar:

Using shortcuts as labels:
Another neat idea is to use shortcuts as labels to further organize other shortcuts (or any object for that matter) in the workspace or inside different containers. For example, use this technique to organize a project you are currently working on:
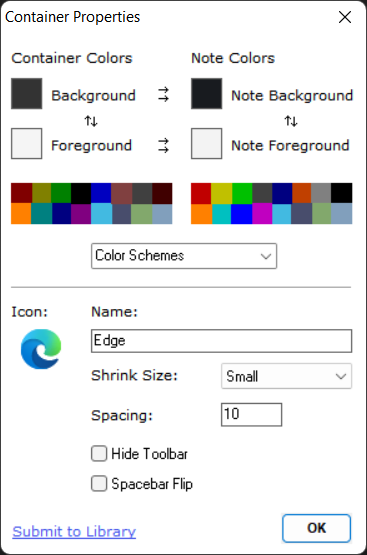
Add a shortcut to any random file and change its icon to any generic icon that indicates it's a label and not an actual shortcut. It's possible to change the font size and color as shown in the image above.
SideSlide is fully keyboard accessible allowing you to keep your hands on the keyboard and still quickly open any shortcut, website, folder or news feed.
Use the arrow keys to select and move shortcuts (Shift/Ctrl)
Use [Ctrl+Z] and [Ctrl+Y] to Undo/Redo containers and shortcuts size and position.
Undo/Redo demo.
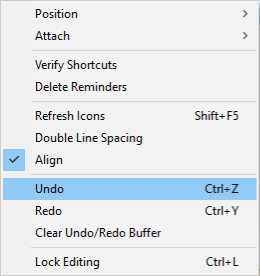
Undo/Redo under the Arrange menu.
Use the [Spacebar] key to flip forward through containers in the workspace, or [Shift+Spacebar] to flip backward (focus, unfold, and expand).
- You can choose to flip through all containers, RSS news feeds, notes, reminders, or individually selected containers. To customize, go to [Settings → Keyboard Navigation → Spacebar Flip]. To include specific containers in the Spacebar Flip function, right-click the container title → Arrange → Spacebar Flip. This feature can be toggled on or off for multiple selected containers by holding Ctrl and left-clicking the containers.
- Press the [Esc] key to shrink or fold containers.
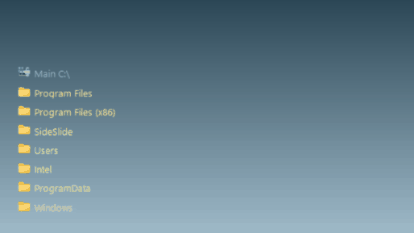
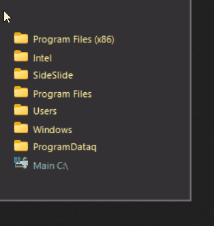
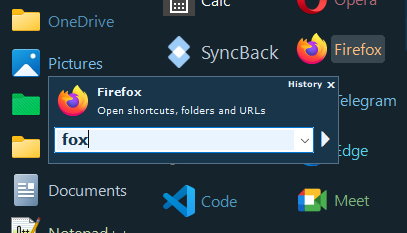
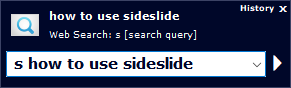
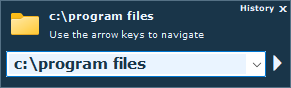
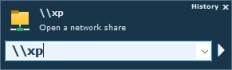
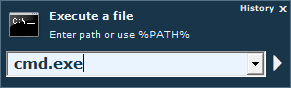
The Keyboard Launcher allows you to start any shortcut in the workspace with any custom parameters, open websites, easily open directories by navigating the directory tree, start all shortcuts that share a specific tag, create notes, calculate an expression, set quick reminders and search the web.
To activate the Keyboard Launcher, simply press on any key when the workspace is in focus:
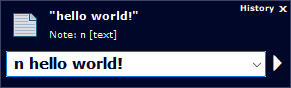
Tip: Notes can be automatically detached from the workspace upon creation by selecting [Settings → Containers → Detach Notes]. Invoke the workspace using the Global Hotkey, press [Ctrl+N] (or type "n " + text) to create a new note. When the note container is detached, tuck it away in the corner of the screen using [Alt+Left], [Alt+Right], [Alt+Up] or [Alt+Down]:

The same applies to reminders. See below for more details.
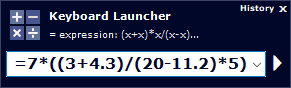
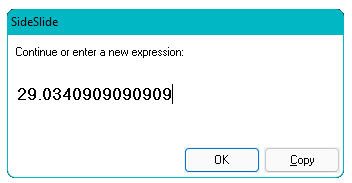
Press [Enter] to see the result, continue the calculation or start a new one. There is also an option to copy the result to the clipboard:
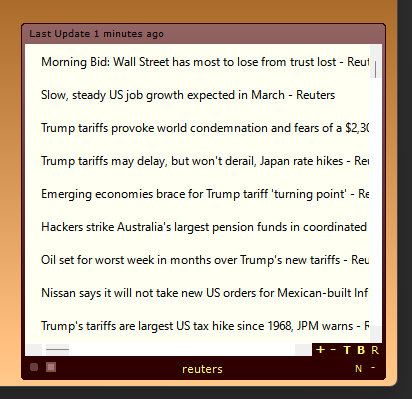
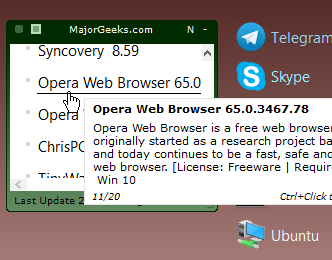
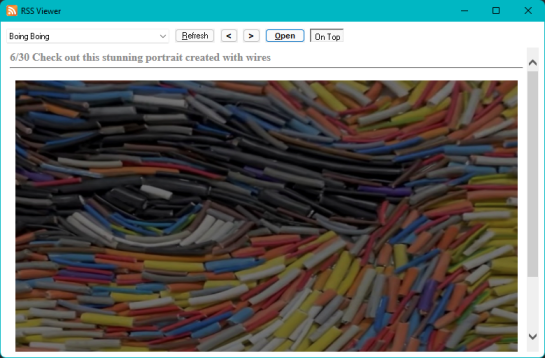
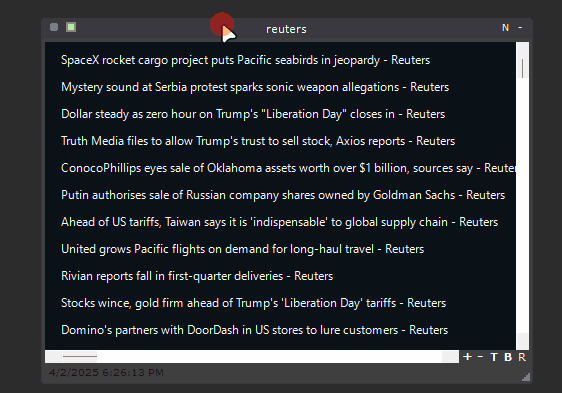
SideSlide includes support for displaying RSS news feeds inside special containers. Track multiple feeds in one convenient location. Either have all RSS containers accessible from the workspace, shrunk, folded or fully visibly, or detached from the workspace to gain additional control. In addition to a built in viewer, SideSlide allows you to track subjects that interest you by highlighting headlines that contain predetermined keywords and filtering news feeds for specific items.
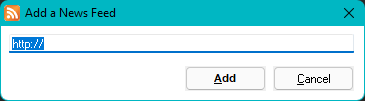
Add RSS news feeds by using the Add a News Feed dialog (Menu → New → RSS News Feed or [Ctrl+E]):
The new news feed will appear inside a container:
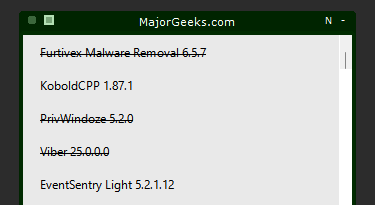
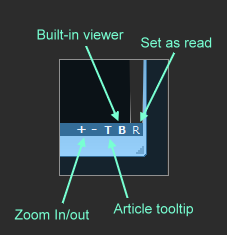
Highlight headlines of feeds that contain specific words by adding subjects you are interested in to the Subject Tracker: Subject Tracker → Add. When refreshing a feed and the tracked subject is found in one of the articles, the article's headline will be highlighted:
Rather than highlighting specific headlines, it's also possible to filter out any headline that doesn't contain one or more of the specified keywords. Select the 'Filter...' menu command from the RSS right-click menu and enter a comma separated list of keywords. Headlines containing one or more of the keywords in the list will be shown while all the rest will remain hidden:
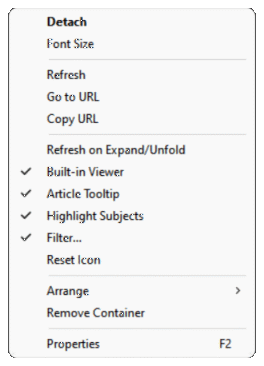
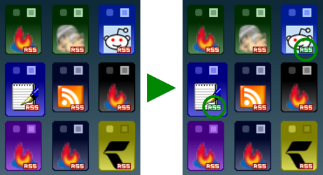
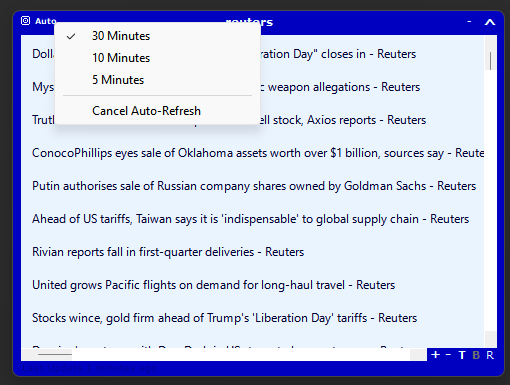
Detaching news feed containers
When RSS news feed containers are detached, set them to automatically refresh every 5, 10 or 30 minutes by clicking 'Auto':

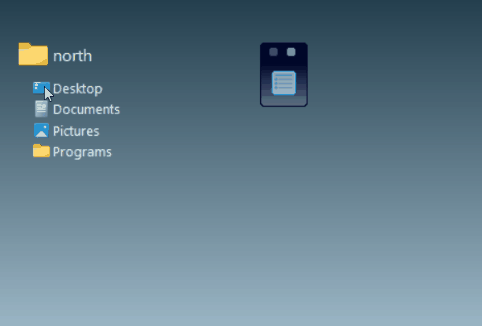
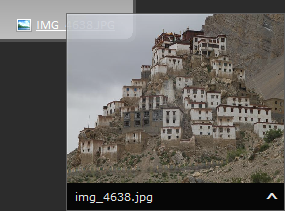
Add pictures to the workspace or to a container from the New right-click menu, or by dragging a picture file from Windows Explorer or an image from the web browser while holding down the [Shift] key:

There are a few things that can be done with each picture, such as, replacing it with another one keeping the same size, adding a comment (visible when hovering with the mouse over the picture), converting it to a shortcut to the picture file, changing to a relative path and more. Right-click a picture to see the menu:

Every JPEG picture you add to the workspace can be turned into a slideshow, displaying other pictures from the same folder. Start the slideshow by clicking the [Play] button at the bottom right of the picture, and stop is with the [Stop] button. By default, the slideshow will advance every time the workspace is undocked, keeping things interesting. This functionality can be disabled via [Settings → Dock → Auto Slideshow].
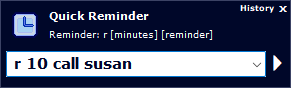
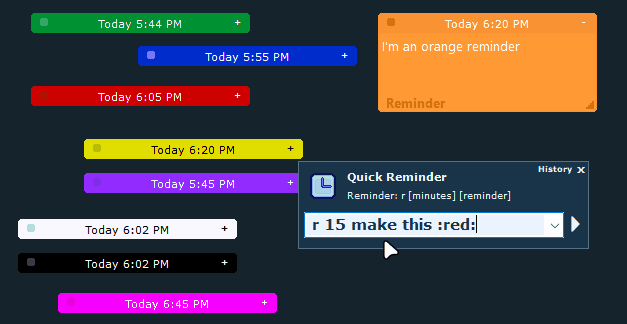
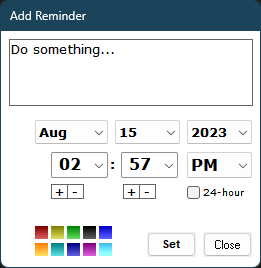
SideSlide lets you add multiple reminders to the workspace. You can add a reminder from the right-click menu, use the keyboard shortcut [Ctrl+R], drag text (e.g., from the web or Outlook) while holding [Shift], or quickly enter a reminder by typing 'r' followed by the minutes and text.
Here's the Add Reminder dialog:
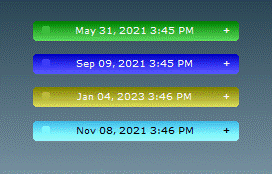
By default, reminders are added as folded containers showing the scheduled date and time:
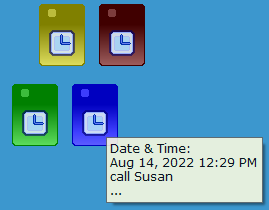
Reminders are special containers, so it's possible to edit the text inside, change colors and more. When hovering over the reminder icon (when shrunk) or name (when folded), a tooltip will be displayed showing the time it is scheduled to appear:
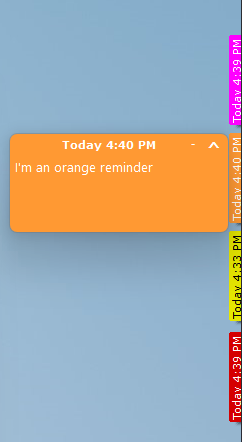
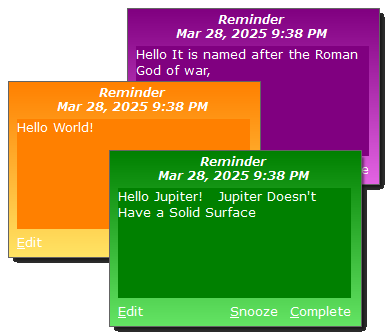
The reminder alert appears in the bottom-right corner of the screen. The alert's color corresponds to the reminder color in the workspace:
There’s much more to explore with SideSlide, including features like Folder Connectors and more. Be sure to right-click everything and experiment! Until a proper user manual is ready, this tour will help you get started. You can also find lots of details in the Change Log about newly added features.
 Use SideSlide
from a USB drive/Portable Installation
Use SideSlide
from a USB drive/Portable Installation
Download the portable version Zip file from the Download page and extract to the USB drive.
Any object (wallpaper, file, folder, picture, etc) you add from the same USB drive will be accessible even when Windows assigns a different drive letter to the drive.
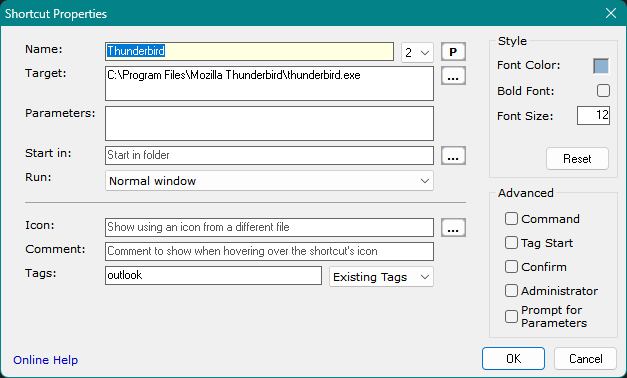
Quickly change the target path for shortcuts be using the "@" (at symbol) instead of the drive letter when editing shortcuts from within the Shortcut Properties dialog.
 Multiple Workspaces
To use multiple workspaces, extract the portable version into separate folders (e.g., SideSlide1, SideSlide2, etc.) and launch SideSlide.exe from each folder. You can customize the title for each workspace by navigating to Settings → General and adjusting the Title Bar option. This allows you to treat each workspace as a distinct container, making it easier to differentiate between them. Additionally, you can completely hide the title bar using the /notitlebar command-line parameter. If you prefer, the workspace can be shown as a tab with a custom label when docked, making it even simpler to identify each workspace. To set this up, go to Settings → Dock → Size → Tab.
You can also launch all workspaces simultaneously by starting the main workspace first. To do this, create a container named #STARTUP and place shortcuts to the other SideSlide.exe executable files inside it. Additionally, you can use the /notitlebar and /nosplash command-line parameters for each of the shortcuts from within the Shortcut Properties dialog.
When starting SideSlide with the /notitlebar command-line parameter, a new menu command will appear, allowing you to quickly toggle the title bar on and off for quick adjustments:
Show/Hide the Workspaces using a 3rd party software
When starting SideSlide.exe from the same location (e.g. the default installation folder), the workspace will show if it's hidden or undock. You can use a 3rd party software such as Logitech SetPoint, Microsoft Keyboard and Mouse Center or the Surface Pen to set a button that shows and hides the workspace by pointing to SideSlide.exe.
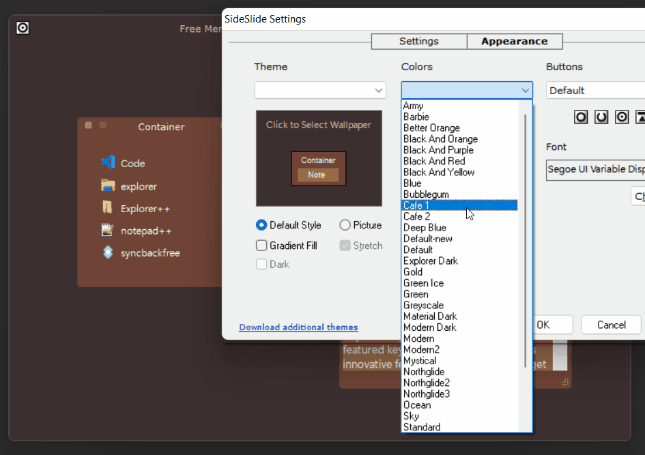
Themes (Last Update: April 15, 2025)
Download additional themes to completely change SideSlide's appearance:
Custom Default Container Icons
Exit the program and overwrite the icons located in the SideSlide root folder (reminder.ico, note.ico, and emptyicon.ico) with the ones in the zip file:
Command line arguments
/?: Display a list of command line arguments./hide: Launch SideSlide with the main workspace window hidden./nosplash: Suppress the splash screen at startup./notitlebar: Hide SideSlide's title bar. Useful when running multiple instances of SideSlide./portable: Launch SideSlide in portable mode./loadrss: Load RSS newsfeeds on startup.For backup:
/backup: Backup SideSlide settings into a zip file. The file, SideSlide_Backup.zip, is created in SideSlide's settings folder unless the /path option is specified./path [path]: Destination folder for the backup Zip file./silent: Suppress the "Backup Complete" notification. Using non-English characters for shortcuts, container names and other workspace elements (v5.45b and above)
Setting a Language for Non-Unicode Applications:
Windows Vista/7/8/10/11: Starting an app that requires admin
privileges without the UAC prompt
Select the Administrator check-box for shortcuts that require admin privileges, but it's also possible to run shortcuts with the highest privileges without the UAC prompt:
From SideSlide:
Shortcut to My Computer
Shortcut to delete folders and files
@echo off
if exist %1\ (
	rmdir /s %1
) else (
	if exist %1 (
		del %1
	)
)
 Taking back Win+S shortcut key
Since the Windows 10 Anniversary Update, the key combination Win+S opens Search/Cortana.
If you want to use it for SideSlide again, follow these steps:
HKEY_CURRENT_USER\Software\Microsoft\Windows\CurrentVersion\Explorer\Advanced\
You will now be able to use Win+S as SideSlide's Global Hotkey.
Alternatively, you can download and run this registry file to make the change automatically.
Always back up the registry before making any changes!
Shortcut to 'Show my Desktop' (hide/minimize all windows and show the desktop)
Create a new System Command shortcut (Ctrl+O), then copy and paste the following in the Command field:
%windir%\explorer.exe shell:::{3080F90D-D7AD-11D9-BD98-0000947B0257}
Set the "Run:" dropdown list to "Minimized".
Windows 10/11 apps
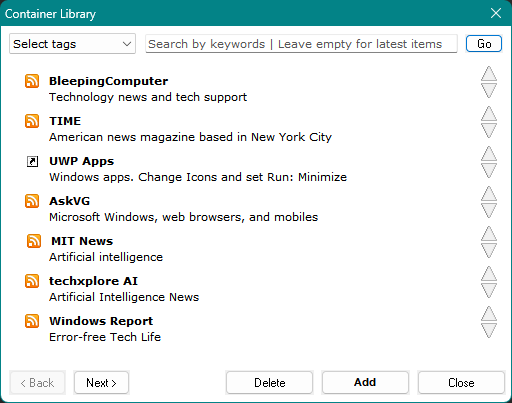
1. Open the Container Library [F6].
2. Enter 'apps' in the Search field and press the Enter key or click the 'Go' button.
3. Select a container and click 'Add'.
Shortcut to Task Manager
Search for "Task Manager" in the Container Library [F6] and add the container. Move the shortcut to any location in the workspace and also set it for Speed Launch.
Shortcut to the Windows Terminal and executing commands from the Keyboard Launcher (Windows 11)
Create a new System Command and enter 'wt' in the Command field, or create a normal shortcut and enter 'wt' in the Target field. Then, set the icon to point to C:\Program Files\WindowsApps\Microsoft.WindowsTerminal_1.22.10731.0_x64__8wekyb3d8bbwe\wt.exe (or a similar location)
![]() Shortcut to Microsoft Edge Browser
Shortcut to Microsoft Edge Browser
Create a new Web URL shortcut (Ctrl+W) and paste the following into the URL field:
microsoft-edge://
Shortcut to Windows Update
Create a new System Command shortcut (Ctrl+O), then copy and paste the following in the Command field:
start ms-settings:windowsupdate
Select "Minimized" from the "Run" drop-down list.
Other Windows apps
Create a new Web URL shortcut (Ctrl+W), then copy and paste one of the following in the URL field:
bingweather://
bingmaps://
ms-clock://
ms-photos://
microsoft.windows.camera://
onenote-cmd://
mailto://
ms-windows-store://
mswindowsmusic://
mswindowsvideo://
ms-settings://
calculator://
ms-todo://


If you find SideSlide useful and would like to show your appreciation, please consider a small donation by clicking the Donate button above. Your donation is a huge help to keeping SideSlide alive and kicking!
If you do not want to use a PayPal account, notice on the PayPal page there is a link to continue without a PayPal account.

Donate Bitcoin: bc1q7d2t39wqzse85u96frmpzms98e5r9365qp0f9y
Thank You!